Norton Internet Security 2012 19.8.0.14 Final

Norton Internet Security 2012 19.8.0.14 Final | 126 Mb


Norton, one of the oldest and trusted security app that has been doing good since. If one as me who has a pc late back when there weren't much options for having a security app then we used to have Norton, though making your system give a tough time yet protecting it at its best. Serials included!

The Internet is a dangerous place, and cybercriminals are getting more creative in ways to target you and your invaluable personal information. Norton Internet Security 2012 provides our most powerful virus, online and PC protection so you can do more without interruption.

Browse, shop, and bank online with powerful protection against getting attacked or ripped off. Norton™ Internet Security for Mac® blocks dangerous websites, and detects and eliminates online threats so you can safely enjoy your favorite Internet activities.

Features :
• Online identity protection
• Antivirus
• Antispyware
• Antispam
• Phishing protection
• Smart firewall
• Social network protection
• Browser protection
• Rootkit protection
• Network mapping and monitoring
• Worm protection
• Parental controls management


28 Aug, 2012


-
Source: http://winkom.blogspot.com/2012/08/norton-internet-security-2012-198014.html
--
Manage subscription | Powered by rssforward.com

How to upgrade from Windows 8 Release Preview to Windows 8 RTM

As we know Microsoft do NOT recommend upgrading from any pre-release version of Windows to Windows RTM. Similarly you can't upgrade from any prerelease version of Windows 8 (including Developer, Consumer and Release Preview) to Windows 8 RTM.
You can find out more details about Windows 8 Upgrade Path here.
But we have come to know an easy workaround and in this blog post you will learn how to change minimum build requirement to upgrade from any prerelease version of Windows 8 to Windows 8 RTM.

How To:

  1. In order to do that, you need to extract Windows 8 RTM ISO to some folder. For instance, I extracted it within C:\WIN8DVD
  2. In Sources folder, find and open csversion.ini with notepad and you will see the following content.csversion-8508Here 8508.0 is minimum required build number for Windows 8 RTM Upgrade. That means that Windows 8 Build 8508 (an interim build) or higher can be upgraded to RTM build.
  3. So change MinClient and MinServer numbers from 8508.0 to your currently installed prelease version of Windows 8 Build.Here is the list of public builds
    Windows 8 Public Releases Build Number
    Windows 8 Developer Preview 8102
    Windows 8 Consumer Preview 8250
    Windows 8 Release Preview 8400
    For instance, I changed 8508.0 to 8400.0 csversion-8400
  4. That's it. Save the file and create bootable Windows 8 ISO DVD or USB stick and run setup. And you would be able to upgrade from the prelease version of Windows 8 to RTM build.
Applies To:

28 Aug, 2012


-
Source: http://winkom.blogspot.com/2012/08/how-to-upgrade-from-windows-8-release.html
--
Manage subscription | Powered by rssforward.com

How to create bootable Windows 8 USB Stick using DISKPART

Gone are the days, when we used to burn CD and DVDs to install operating systems. Now all modern operating systems lets you install using PEN Drive / USB Storage Device / USB Stick. And this article describes step by step guide to format and create bootable Windows Vista / Windows 7 / Windows 8 USB Stick.
Prerequisites:
  • Windows Vista / Windows 7 / Windows 8 ISO or installation files
  • A 4GB USB 2.0 Storage device (Its recommended to use USB 2.0 or USB 3.0 device for optimal performance)
How To:
  1. Plug your USB storage device. and run Command Prompt and execute the following commands one by one.

    Diskpart Run Disk partition utility List disk To get disk index that is used to perform disk partitioning. Select disk n Selects disk n to perform disk partitioning. n is the number for your USB flash drive you obtained from above command. Clean Flush your existing all USB drive's partitions. Create partition primary Creates a partition as primary partition. Active Set the partition as active to hold bootmgr. Format FS=NTFS QUICK Perform a quick format on the USB Flash drive Assign Assign a drive letter to the partition Exit To quit Diskpart utility

  2. Now copy all setup files to USB storage device… and that's All.
  3. Re-boot your PC with it, you will be able to boot and install Windows Vista/Windows 7/Windows 8 using USB Stick.
Note: If you face any trouble to boot with it or unable to boot, try this FIX.

I:\Boot\Bootsect.exe /NT60 I:
Where I: is the drive letter of USB Stick

28 Aug, 2012


-
Source: http://winkom.blogspot.com/2012/08/how-to-create-bootable-windows-8-usb.html
--
Manage subscription | Powered by rssforward.com

How to bypass product key while installing Windows 8

Microsoft has released Windows 8 to MSDN/TechNet subscribers and few other channels starting from August 15th. Few weeks ago; I got lucky to lay hands on it and I noticed that Windows 8 doesn't allow keyless installation, like Windows 7, by default.
windows 8 setup product key
But after doing some R&D I have found a way to bypass the product key wizard while performing the installation. And in this article, you'll learn how to suppress product key prompt while installing Windows 8.
Note: The following method is effective, legal, and does not requires a lot of technical expertise.

Prerequisites:

How To:

  1. First of all, Download and extract the ISO file of Windows 8 RTM version you own.
  2. Open Notepad to create a file with following code structure and save as ei.cfg in Sources folder.
       [EditionID]   {Edition ID}   [Channel]   {Channel Type}   [VL]   {Volume License}   
    The edition configuration file (EI.cfg) determines which edition of Windows to install and which license to use during Windows Setup. Where {Edition ID} must be a valid Windows Edition ID such as Core, Pro and Enterprise. {Channel Type} can be OEM or Retail. {Volume License} can be 1 (True) or 0 (False). For example:
       [EditionID]   Core   [Channel]   Retail   [VL]   0   
  3. Now create the bootable ISO and burn your product key prompt suppressed Windows 8 installation disc

28 Aug, 2012


-
Source: http://winkom.blogspot.com/2012/08/how-to-bypass-product-key-while.html
--
Manage subscription | Powered by rssforward.com

DivX Plus 8.1.3 Build 1.8.0.16

DivX Plus 8.1.3 Build 1.8.0.16 | 44.11 Mb

The next generation of DivX video! Download DivX Plus™ Software to play DivX®, AVI, MKV, MOV and MP4 video with our media player. Or watch these videos in other popular media players like Windows Media Player or Media Player classic. Purchase DivX Pro to create your own HD DivX videos.

DivX® is a digital video format that offers a high-quality viewing experience on any device or platform — from your PC to your phone to your living room TV. Over 100 million devices that support DivX video have shipped worldwide from major manufactures, including DVD players, gaming consoles, mobile phones and more.

DivX® gives you the power to watch, create and share high-quality videos on your Windows or Mac computer. DivX technology enables highly compressed video without compromising visual quality — so you can enjoy a cinematic experience on your computer, in your living room or wherever you go.


28 Aug, 2012


-
Source: http://winkom.blogspot.com/2012/08/divx-plus-813-build-18016.html
--
Manage subscription | Powered by rssforward.com

Aplikasi Penyadap SMS Orang Lain

Pernahkah terpikir oleh anda ingin menyadap sms ponsel pacar anda atau teman anda mungkin? apakah bisa? tentu saja bisa. Ada satu aplikasi yang namanya sms anywhere. Aplikasi canggih ini bisa di gunakan untuk menyadap sms masuk dan keluar bahkan mampu menyadap voice log tanpa di ketahui(ultra edition) dengan cara meneruskan pesan yang ada di ponsel.

Jadi sms yang masuk akan di teruskan ke ponsel kita.

Sebenarnya Sudah banyak artikel yang membahas ini tapi mungkin menemui kegagalan. Di mana letak salahnya?. Coba ikuti tips di bawah ini(hanya berlaku untuk ponsel symbian S60 v2 dan S60v3, contoh nokia 6600, 3650, 7610,N70 dll):

Instal aplikasi sms anywhere di hanya di ponsel korban, tidak perlu di ponsel anda.
Kecanggihan aplikasi ini adalah icon menu tidak terlihat di menu. Seluruh pengontrolan dilakukan melalui sms, berikut perintah-perintah yang dapat anda lakukan. Ingat, kirim perintah ini dari nomor anda ke nomor korban.

Cara Kerja aplikasi:

  1. Pertama, anda harus masukkan nomor yang akan dijadikan nomor penerusan sms(nomor anda), dengan cara ketik SA12345678 Dnomoranda (contoh : SA12345678 d+62xxxxxxxxx).
  2. Jika anda ingin meneruskan sms keluar, ketik SA12345678 S1
  3. Jika anda ingin meneruskan sms masuk, ketik SA12345678 R1

selamat mencoba!

Untuk ponsel dengan tipe:
Nokia E50, E51, E55, E60, E61, E62, E63, E65, E66, E70, E71, E75, E90, N71, N73, N75, N76, N77, N78, N79, N80, N81, N82, N85, N91, N92, N93, N95, N96, 3250, 5320, 5500, 5630, 5700, 5800, 6110, 6120, 6121, 6122, 6124, 6210, 6220, 6290, 6650, 6710, 6720
Samsung SGH-i400, SGH-i450, SGH-i520, SGH-i550, SGH-i560, SGH-i570, L870, G810, i7110, i8510 INNOV8, L780
LG KS10, KT610, KT615
Link Download : Aplikasi Penyadap SMS Orang lain

Perhatian :

    Jangan sampai salah memasukkan kode(spasi yang salah, password dll). karena hal inilah yang sering menyebabkan kegagalan. Kesalahan dalam memasukkan kode mengakibatkan aplikasi tidak berfungsi.
    Aplikasi ini shareware dan terbatas hanya pada 5 kali penerusan pesan. artinya, jika anda ingin melanjutkan pemakaian aplikasi ini anda dapat membayar lisensi nya di wireless-labs.com, biaya untuk lisensi standart edition paling murah sekitar 18 Euro (Rp.287ribu). Namun jika anda beruntung dan aplikasi mengalami bug, anda bisa menikmati aplikasi ini tanpa batas seperti yang pernah saya alami. Jika ingin menggunakan yang gratis, anda dapat mencoba sms forwarder lite, tentu saja dengan fungsi yang tidak canggih seperti sms anywhere.
     

Cara untuk mencegahnya :

  1.  Masuk ke menu pengaturan
  2.  Buka manajer file
  3.  Papus nama aplikasi smsanywhere/lite dari handphone anda.
  4.  Selesai.


UPDATE

Resiko di tanggung sendiri jika ada peperang atau kerusakan software :-)

28 Aug, 2012


-
Source: http://winkom.blogspot.com/2012/08/aplikasi-penyadap-sms-orang-lain.html
--
Manage subscription | Powered by rssforward.com

Activation Windows 8

Activation Windows 8

How to activate Windows 8? New activators of Windows 8. Last activators of Windows 8. Activate Windows 8 RTM. Windows 8 RTM OEM Activation. Activate Windows 8 Final. Windows 8 Loader. Activate Windows 8 Release Preview.

Activator Windows 8 ? 1

Windows 8 Activator KMS - an activator of Windows 8. Allows you to easily disable Timebomb in Windows 8 and activate it for 180 days. Activator allows you to bypass the restrictions on time steps (timebomb) for Windows 8, causing activation was not possible and this caused some inconvenience for want test the Win 8 at this stage of development.

Windows 8 will be activated for 180 days and then will need to repeat the activation procedure. You can use the mini-KMS Activator and set the activation service, which will allow to forget about the limit of 180 days (activation will be automatic). Select the activation method of your choice, the main problem - remove timebomb, has successfully solved this activator.

Changes in version:

• Logging feature

• Everything could be done in Normal Mode now

• Credits updated

• No more freezing window during activation or refresh

• Enabling hidden features now displays message after completion

• Timebomb restore fixed

================

[INSTALL NOTES]

================

Step 1: unpack rar archive

Step 2: run the setup and read the instructions

Step 3: Enjoy and Support Developers, Buy It, They Deserved It!

Mediafire Pass : mediafire-software4u

If This Software Link are Fail or Deleted Please make comment. We are trying to re-upload this thanks.

28 Aug, 2012


-
Source: http://winkom.blogspot.com/2012/08/activation-windows-8.html
--
Manage subscription | Powered by rssforward.com

Microsoft Windows 8 Default keys [ALL EDITIONS X86,X64,SERVER]

Microsoft Windows 8 Default keys [ALL EDITIONS X86,X64,SERVER]

these keys are for the following editions.

MICROSOFT.WINDOWS.8.PROFESSIONAL.RTM.X86.ENGLISH.

MICROSOFT.WINDOWS.8.PROFESSIONAL.RTM.X64.ENGLISH.

MICROSOFT.WINDOWS.8.ENTERPRISE.RTM.X86.VOLUME.ENGLISH

MICROSOFT.WINDOWS.8.ENTERPRISE.RTM.X64.VOLUME.ENGLISH

MICROSOFT.WINDOWS.SERVER.2012.DATACENTER.RTM.VOLUME.ENGLISH

Mediafire Pass : mediafire-software4u

If This Software Link are Fail or Deleted Please make comment. We are trying to re-upload this thanks.

28 Aug, 2012


-
Source: http://winkom.blogspot.com/2012/08/microsoft-windows-8-default-keys-all.html
--
Manage subscription | Powered by rssforward.com

Winstep Nexus Ultimate 11.10

Blue Software Free Download ! The Winstep Nexus Dock is a professional dock for windows application. With Nexus, when you will use the applications you frequently use with a click and the Nexus will work with the show and you have a new experience to use it.

sceershot:

Blue Software | Winstep Nexus Ultimate 11.10

Features

  • Display running applications on the dock with task grouping, filtering and icon customization options.
  • Display system tray on the dock as single or grouped icons.
  • Blur-Behind and colorization of dock backgrounds.
  • Monitor active connections and bandwidth usage with Net Meter module.
  • Get weather forecast for over 39,000 cities world-wide.
  • Multiple mouse over effects: zoom, swing, bounce and more!
  • Live icon reflections and animated water-like effects for reflections and dock backgrounds.
  • Easily change appearence of icons of running programs and shortcuts by drag & dropping PNG, ICO and tif files directly into the icon.
  • Multi-monitor support.
  • Compatible with skins for all 3rd party docks.
  • Multiple docks and ability to group shortcuts into nested sub-docks.
  • Duplicate, delete and disable/enable existing docks.
  • Categorize applications into user-defined tabs on the Shelf (Tabbed Dock).
  • Increase productivity by displaying the contents of folders, the Desktop, My Computer, Control Panel and more as tabs on the Shelf.
  • Reduce clutter by hidding Desktop icons and using the Desktop tab on the Shelf instead.
  • Display running tasks and system tray on the Shelf.
  • One click theme switch with special Themes tab on the Shelf.
  • Display modules (docklets) on the Shelf.
  • Re-arrange tabs in the Shelf by drag & drop.

Download Link:

Winstep Nexus Ultimate 11.10

28 Aug, 2012


-
Source: http://winkom.blogspot.com/2012/08/winstep-nexus-ultimate-1110.html
--
Manage subscription | Powered by rssforward.com

PC Tools File Recover 9.0.0.152 Full

PC Tools File Recover 9.0.0.152 Full | Hello my friend, this time I will share a tool that is sure worth a try mate. Yes, PC ToolsFile Recover its name, is a tool that works to restore data that has been erased or lost, whether intentional or unintentional, of course. Maybe my friend never lose important data, and confused what to do? try this software first. PC Tools File Recover can recoverall types of data, be it images, video, music, documents, and all other data types.

sceernshoot:

Features :

Restore lost music, photos, and other documents lost to accidental deletion or corruption.

Restores files from hard drives and other types of fixed media

Powered by a rapid scan engine that can find and recover lost files in minutes

Allows you to specify what drives you want to scan, the file types you want to scan for, the size of your files, and even the file names you want to find and recover

Utilizes a non-destructive, read-only file recovery approach that won't damage your lost files


Supports IDE/ATA/SCSI hard drives

Supports hard drives formatted with FAT16, FAT32, ExFAT and NTFS file systems

System Requirements :

Microsoft® Windows® XP SP3 (32bit only)

CPU: Pentium® 4 or equivalent 233 Mhz (minimum) | Core™2Duo or equivalent 300 Mhz (recommended)

Memory: 64 MB (minimum) | 128 MB (recommended)

Microsoft Windows Vista® (32bit and 64bit)

CPU: 1 Ghz

Memory: 1 GB

Microsoft Windows 7

CPU: 1 Ghz

Memory: 1 GB for 32 bit or 2 GB for 64 bit

Hardware Requirements

HDD: 50 MB free

Video: SVGA (1024x768)

CD-ROM drive (if not installing via electronic software download)

Internet access is required to register product and receive product updates

Screenshoot :

Download Link :

28 Aug, 2012


-
Source: http://winkom.blogspot.com/2012/08/pc-tools-file-recover-900152-full.html
--
Manage subscription | Powered by rssforward.com

Cara Remove Deepfreeze dari Komputer

Saya tidak bertanggung jawab atas penyalahgunaan artikel ini, saya hanya bermaksud untuk berbagi, karena saya melihat banyak yang mengalami masalah seperti ini dan bingung cara menghadapinya, akhirnya mereka install ulang kompinya, padahal itu tidak perlu.


Berikut 3 Cara Uninstall DeepFreeze V6 - UnDeepFreeze V6, tidak pelu dipakai semua, cukup pilih salah satu cara yang menurut anda mudah: 

Cara Pertama:

1. Siapkan CDROM dan CD Installer Windos XP nya

2. Atur First Boot priority nya menjadi CD-ROM

3. Restart Kompi dan pilih boot from CD-ROM

4. Ikuti langkah2 seperti pada saat install Windos

5. Sampai pada bagian Enter to Setup … Enterlah lalu tekan F8

untuk persetujuan dan tunggu beberapa saat

6. Lalu tekan R untuk repair (Repair Setup). Tapi sebelumnya


pastikan dulu setelah tekan F8 ada pilihan "repair …" nya apa ga.

Kalo ga ada, saya sarankan jangan dilanjutin dulu.

7. Selanjutnya ikuti langkah2 install windos berikutnya sampe selese.

8. Sekarang siapkan DeepFreeze v.6 nya dan double klik

9. Maka akan muncul jendela unInstall DeepFreeze dan lakukan proses uninstall sampai selese

10. Selesai....


Cara Kedua:

1. install DeepFreeze yg sama ke kompi lain

2. set statenya di Thawed mode, kemudian

3. copy file $Persi0.sys yang ada di drive C:\ nya…

4. Kembali ke komputer yg error df nya itu

5. Gunakan OS live CD, (Baca di SINI )

6. Copy kan $Persi0.sys tadi di C:\

7. replace original file

8. Restart dan boot kembali dengan OS aslinya


Cara Ketiga:

1. Download softwarenya disini.  Download UnDeepFreeze V6 Click Here

2. Matikan Anti Virus anda, karena software ini terdeteksi virus.

3. open Anti Deep Freeze


2. Pilih VersiDeepFreeze yang kamu punya dan click apply

3. Kamu akan melihat 2 Deep Freeze Icon di desktopmu

4. Tekan Ctrl+alt+shift dan klik icon deepfreezeyang kedua

5. Kamuakan melihat password di "OTP Token"

6. Copy dan salin kode pada kolom pengisian password deepfreeze anda!!

28 Aug, 2012


-
Source: http://winkom.blogspot.com/2012/08/cara-remove-deepfreeze-dari-komputer.html
--
Manage subscription | Powered by rssforward.com

Cara Restore Kembali File Yang Terhapus Di Memory Card HP/ Kamera

Software Inspector Smart Reovery

Kehilangan File baik terhapus secara sengaja atau tidak sengaja mungkin pernah kita alami dan kadang bikin kita panik atau kalang kabut apalagi kalau file atau gambar itu sangat privasi... WooooW... ,padahal hal tersebut bisa kita atasi karena pada dasarnya file yang kita hapus tidak langsung hilang begitu saja karena masih tersimpan dalam folder tong sampah istilah kerennya Recycle Bin :-) kalau dalam windows, salah satu untuk mengembalikan data tersebut kita bisa menggunaka software Inspector Smart Recovery. nantinya file file tersebut bisa kita dapatkan kembali, ini lah salah satu cara untuk mengembalikan data yang sudah terhapus. Tapi ini juga peringatan buat kalian jika ingin menjual HP yang di dalamnya ada MMC dimana MMC tersebut terdapat dokumen atau photo2 yang menurut anda sangat privasi, merasa sudah di hapus kemudian anda yakin dan tenang. Padahal data tersebut belum sepenuhnya hilang dan bisa di ambil kembali. Saya saranakan ketika ingin menjual HP jangan jual MMC nya jika ada hal hal yang penting dan privasi. 

nah utk dapatkan softwerenya silakan

Download software Inspector Smart Recovery

28 Aug, 2012


-
Source: http://winkom.blogspot.com/2012/08/cara-restore-kembali-file-yang-terhapus.html
--
Manage subscription | Powered by rssforward.com

Cara Flash HP Nokia

Software HP rusak atau kadang ada masalah pada HP kita, mungkin pernah anda alami dan jika seperti itu otomatis kita berpikir untuk membawah ke tukang service HP, Padahal sebenernya ada cara untuk melakukan flash sendiri.

Emang sih kadang kita takut untuk melakukan flash sendiri, takut rusak dan seribu pikiran takut muncul di benak kita hehe, tapi kalau kita gak coba sendiri kita gak tau gimana rasanya jika kita berhasil flash HP kita sendiri, nah berikut saya persembahkan tutorial flash HP terutama untuk jenis HP Nokia mudah mudahan bisa membuka pikiran kita untuk tidak tergantung sama Tukang service kalau hanya mau flash HP kita..

Berikut Komponen koponen yang di perlukan dalah tahap Flash HP

  • Kuatkan mental anda dulu sebelum flash HP kita hehe
  • Komputer pentium 3 ke atas, baik windows xp, vista, maupun windows 7
  • Software Phoenix 2011 Download
  • Firmware yang sesuai dengan type handhone kita, bisa di download DISINI dan DISINI
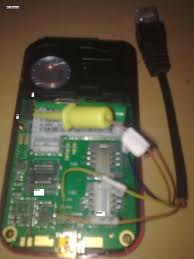
  • Kabel Data nokia, untuk kabel data kalian tidak bisa mendownloadnya
 Untuk memulai angkah-langkah ini, pastikan kita sudah menghapus semua software yang berbau nokia, seperti nokia pc suite, nokia software updater,dll, kemudian restart komputer.

Install software phoenix 2011 yang sudah di download tadi, Setelah semua firmware terdownload, copykan ke C:/Program Files/Nokia/Phoenix/Products/RM-xxx.

Xxx adalah Kode dari RM kalian, sebagai contoh N73 adalah C:/Program Files/ Nokia/Phoenix/Products/RM-133.

firmware adalah file yang nantinya kita gunakan untuk flash hp nokia kita, untuk dimasukan ke dalam handphone. .

Untuk mengecek tipe ponsel kalian bisa lakukan dengan mengetik *#0000# pada ponsel kita, atau dengan melihat tulisan segel hp dengan mencabut batrenya, yang terpenting adalah RM dan versi firmware, karena setiap type ponsel kodenya berbeda-beda, sebagai contoh Nokia N73 saya adalah RM-133 dengan versi firmware 4.0850.43.0.1.

Pastikan kita mendownload firmware yang versinya lebih tinggi dari versi aslinya, dan pilih firmware yang versi APAC, karena firmware ini yang terdapat bahasa indonesianya. .

Pastikan sebelum memulai langkah ini, batrai handphone kalian dalam kondisi penuh untuk mencegah mati saat flashing berlangsung, dan semua data yang berada di dalam memory hp sudah di salin, seperti sms, buku telphone, dll, karena proses flashing akan menghapus semua data yang berada di dalam handphone. .

Setelah semuanya selesai kemudian matikan handphone, cabut kartu memory external dan kartu sim, dan sambungkan hp kalian ke port usb dengan menggunakan kabel data. .

Buka software Phoenix 2011, maka akan terlihat tampilan seperti ini.


Pilih file, kemudian pilih open product pada phoenix

Pada gambar di atas kalian disuruh untuk menentukan type ponsel kalian yang akan di flash, disini saya memilih RM-133 karena hp saya nokia N73, untuk hp yang lain kalian bisa menyesuaikan sendiri. Setelah itu klik OK.

Pilih flashing, kemudian pilih Firmware update, seperti gambar di atas, maka akan mucul tampilan seperti gambar berikut.

Klik kotak kecil seperti gambar di atas untuk memilih firmware yang telah kita masukan.

Beri centang pada Dead phone USB flashing, kemudian klik Refubish, maka akan muncul tampilan seperti ini

 dalam gambar di atas kalian disuruh untuk mengikuti instruksi dari phoenix yaitu


Dalam gambar di atas kalian disuruh untuk mengikuti instruksi dari phoenix yaitu


    Lepas kabel USB

    Lepas battery

    Sambungkan kabel USB kembali

    Masukan battery

    Tekan tombol power ( tekan kira-kira 2-3 detik, jangan sampai nyala )

    Setelah hp terdeteksi kemudian tekan OK.

Tunggu prosesnya sampai selesai, kira-kira 15 menit, usahakan jangan mati listrik karena akan menyebabkan hp mati total.

Segala kerusakan yang terjadi merupakan tanggung jawab pribadi.

28 Aug, 2012


-
Source: http://winkom.blogspot.com/2012/08/cara-flash-hp-nokia.html
--
Manage subscription | Powered by rssforward.com

Cara Flash Hp Cina

Pembaca yang ganteng ganteng dan yang cantik catik.. :-) sebelumnya telah saya bahasa tentang cara flash HP nokia kali ini akan coba saya bahasa tentang bagaimana flash HP cina, Seperti kita ketahui perkembangan hp cina di indonesia begitu pesat bagai magnet banyak masyarakat indonesia beralih ke HP cina, mungkin karena tampilannya gak kalah sama HP nokia, Samsung dan merk merk luar negeri lainya, selain interfacenya gak kalah yang jelas HP cina harganya sesuai dengan isi kantong msyarakat menengah kebawah kayanya sih... dengan uang 400ribu bisa dapatkan hp yang sudan ada kamera, interface cantik dan mungkin sudah ada fasilitas Wifi nya.., tampa memperhatikan segi kwalitas dari hp nya tersebut sehingga tak jarang kita mengalami kerusakan pada softwarenya, nah marik kita sedikit menyempatkan waktu utk membaca tutorial yang saya dapatkan dari googling hari ini cara flash HP cina.. berikut langkah langkahnya:


  1. Kabel data DKU 5, Potong ujung kabel konektor yang ke Hp,kupas dan pisahkan masing-masing kabel isi, biasanya akan kita temui 4 warna: hitam putih, hijau dan merah, namun warna tidak mutlak sama, patokannya warna hitam adalah ground dan merah adalah power(abaikan saja merah ini)kalo tidak yakin dgn komposisi kabel, ukur saja dulu pake tester trutama yang ground.
  2. Modif masing masing kabel, kec merah. pasang penjepit buaya atau konektor apapun terserah(yg penting mudah dipasang/dilepaskan)diujung masing2 kabel, lapisi isolator agar masing2 penjepit/ konektor tidak mudah bersinggungan.
  3. Modif selesai,dgn 3 kabel,hitam=ground,putih=Tx daN hijau=Rx,posisi hijau dan putih bisa bertukar tempat sesuai kebutuhan. Selanjutnya instal Driver Prolific lalu colok kabel data modif, pastikan koneksi sukses dan buka device manager lihat dimana kedudukan comport Prolific berada.
  4. Buka software SPD,connect..dan atur port sesuai com kabel data kita tadi..maka kita sdh siap fight 
  5. Buka HP target,cari diPWB data PINOUT: RX dan TX,biasanya sdh tertera tuh..kadang ada dibalik LCD,ada juga di bawah stiker merk atau ada juga dibawah keytone,tapii kalo ga nemu juga, apes deh tapi bukan buntung..masih ada cara lain utk dapatkan RX dan TX, karena kalo ground kan tinggal konek ke ground Hp atau (-)conbatt. Utk dapatkan RX dan TX yg tidak tertera di PWB,akan sy bahas nanti, sekarang yg sederhana aja.
  6. Sudah nemu RX dan TX- nya? Potong 2 utas kabel,kira2 sejengkal,solder langsung ke pinout RX dan TX. Jepit masing2 kabel tsb ke kabel hijau dan putih di kabel data (ingat,posisi ini bisa diubah sesuai kebutuhan),lalu jepitkan kabel hitam pada ground Hp atau (-)conbatt.
  7. Back to SPD (com sudah diatur sesuai port kabel data), CONNECT ! den tekan BOOT..serta tekan Tombol power ON Hp..ini yg paling penting dalam proses perbaikan ini.. BOOT harus sukses! Dimana nantinya data Hp target akan dibaca oleh SPD. Kalau proses boot gagal atau tdk bereaksi, tukar posisi kabel hijau dan putih, BOOT lagi, ON lagi, sampai disini seharusnya data hp akan terbaca, karena jika tidak, maka ada kemungkinan penyakitnya ada pada Hardware. Kalau sdh error di hardware, biasanya sy ga mau ambil pusing,ogah ngeblow CPU atau IC Flash,resiko MATOT krn PWB hp china kian hari makin tipis dan ga kuat panas..mending dgn kata em sori plis...balikin aja ke user.
  8. Kembali ke Booting tadi, Jika sudah sukses, step kedua adalh READ, dan simpan filenya dgn *bin. File ini akan jadi backup yg se-waktu2 sangat dibutuhkan. Step ke-3,klikFORMAT (eiiit..) sblm proses Formatting, ada baiknya kita seting dulu size defaultnya, klik Default Set dan pilih besaran nilai NOR 16M (0Xe00000-0X200000),kotak centang MAnualFormat dikosongkan sj.
  9. FORMAT deh tu Hp..klik Format, tekan tombol power ON Hp tahan jangan dilepas sampai proses formatting berjalan kira2 50% baru lepas..kalo format sukses,silakan Diskonek SPD dan lihat hasil pada HP..jreeng.. kalo sdh normal sembuh, ya udah..maw apalagi..
  10. Kalau Format ga hasil, baru di FLASH pake file backup tadi, biasanya sdh tokcer..atau mau Upgrade silakan cari dan download firmwarenya.
  11. Kabel data modif tadi bukan cuma untuk Hp china,tp bisa juga utk HP lain dengan cara yg hampir sama, hanya softwarenya yg beda.
Segala resiko di tanggung sendiri

28 Aug, 2012


-
Source: http://winkom.blogspot.com/2012/08/cara-flash-hp-cina.html
--
Manage subscription | Powered by rssforward.com

 
Design by Yuza Cheater | Bloggerized by Free Blogger Templates | Info Terlaris